If you are working on the Sage 50 accounting software, you may come across an error – Sage 50 Error Code 1919. It usually takes place when you are trying to make a registry. This is a technical error in Sage 50, which usually takes place when you are attempting to configure the ODBC (Sage 50 has not properly configured ODBC).
It is alright when you are receiving this error as long as you can follow the steps mentioned below and resolve the issue.
Reason Behind Sage 50 Error Code 1919:
- One of the possible causes can be that the Windows registry is missing out few of its registration keys
- This specific error message will be displayed in the Apply to section, in case you are running any kind of Setup Program for any sort of programs that are listed
- You get to see error code 1919 on your computer screen and that means that there is an error in configuring ODBC data source : MS Access Database
- You can also receive this error message and the error code pops up on your screen if there is an ODBC Error 6, which means that it cannot find the component in the registry. For that, you need to verify that the MS Access Database File exists and also that you can now properly access it
How to Identify Sage 50 Error Code 1919:
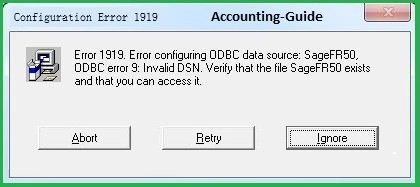
When you are encountering the Sage 50 Error Code 1919, you will get to see the following error messages on your computer screen:
- “Error 1919 states that Error in configuring ODBC data source: Excel file (s). ODBC Error 0 asks you to verify that the Excel File (s) exists and you can easily access it.”
- “Error 1919 means that Error in configuring ODBC data source: MS Access Database. ODBC error 0 suggests you to verify the file MS Access Database exists and you can easily access it.”
- “Error 1919 means that Error in configuring ODBC data source: dBASE Files. ODBC Error 6: Please verify the existence of the file dBASE and its accessibility.”
Also Read: How to Fix Sage 50 Error 1920 Service Error failed
How to Resolve Sage 50 Error Code 1919:
Solution: Resetting the Registry Keys Utilizing Mdac.inf File Method:
- First and foremost you need to click on the Windows Start option
- After that, you need to tap on the Run menu
- In the run dialog box, you need to type “Pth\inf”
- Once done, you need to click on OK
- It will directly lead you to the computer’s C:\ drive
- After that, navigate to the Tools menu and choose the Folder Option
- Navigate to the View Tab > Advanced Settings > Show hidden files and folders > OK
- Once that is done, you will be able to see Mdac.inf file on your computer screen. You need to right-click on it and click on the install option
- Once that is done, you will be asked for your Windows Installation CD. You will need to insert that in your DVD /CD ROM drive
- You need to select the folder with the name “1386” from your hard disk and then click on OK
- Lastly, when everything is done, you need to restart your system.
Related Article: How to Fix Sage 50 Login Error
Final Words!
With the solutions and the steps mentioned above, you will be able to fix the Sage 50 Error Code 1919 on your computer. In case you are facing any kind of issues or have any kind of queries, feel free to reach out to our team for further guidance.
💠Frequently Asked Questions💠
Q1. What Happens if the Software Has Not Configured the ODBC Correctly?
Ans: When the software has not configured the ODBC file correctly, you get to see the Sage 50 Error Code 1919. In order to resolve this issue, you need to make sure that you are logged into Windows as a user who has the complete privileges of an administrator and after that, you need to install the software again, that too, directly from the installation files.
Q2. How do we Enable Administrative Access if it’s Hidden?
Ans: Follow the steps mentioned below to enable your administrative access if they are hidden:
🔸 Open the Run window
🔸 Type CMD and then click on the Enter button
🔸 Window Command Prompt box pops up on your screen
🔸 Type the net user administrator or active: yes
🔸 You need to press the Enter button
🔸 Type the Exit and press the Enter button again
🔸 The Administrator account is now visible to you whenever you try to log in to your system