Job costing entails spending tracking for a job and then comparing that expenditure to the revenue. In QuickBooks, Job Costing is a powerful feature that offers many ‘Job Costing tools’ that can help you examine how much money you spend and make for every job. Furthermore, Job Costing assigns costs to a specific client or job. A QuickBooks user does not need to purchase an add-on or a third-party product. In this guide, you will learn how to set up Job Costing in QuickBooks in an efficient way and know more about this QuickBooks term.
Understanding of QuickBooks Job Costing
Job Costing in QuickBooks is used by a variety of businesses including construction firms, professional service firms, and others, to keep track of job costs to ensure that they are profitable. Nonetheless, correct work costing in QuickBooks is a difficult task, but QuickBooks Job Costing makes it easier.
Additionally, businesses use Job Costing features to keep track of where their money is going and to provide firsthand knowledge of the process’s feasibility. QuickBooks Job Costing allows you to monitor each expense so that you can make better predictions and decisions in the future. You can consider the below factors to desired outcomes:
- Identify the jobs that were not be profitable as per the expectation
- Find the difficult jobs
- Make better estimates for Next Jobs.
Setup Job Costing in QuickBooks with Easy Steps
To make use of this QuickBooks feature, you are required to set it up first. With this, you can start using it smoothly for your accounting & bookkeeping purposes. Let’s see the steps which are elaborated underneath:
Step 1: The Initial Preferences Configuration
It is imminent that QuickBooks is correctly configured on your computer for a successful Job costing in QuickBooks with the help of below steps:
💠 First, select the Edit and then Click
💠 Next, choose the tab “Jobs and Estimates” and then hit “Company”
💠 Now, go to the Company Preferences tab and select the relevant modification before you start Job creation
💠 After that, verify the “Time and Expenses” to know that the time tracking is active when you’re looking to track them on the job.
Step 2: Design the Job Types
In this step, you have to design Job types before assigning jobs to clients with the below-given steps:
💠 Select the Lists >>> click “Customers and Vendors Profile”
💠 Click on the Job Type list
💠 A small window appears for the Job Type List with options at your bottom left-hand side
💠 Now, click on the “Job Type” and select “New”
💠 A window pop up with “New Job Type”
💠 Fill out the required information related to the Job Type
💠 Again you have to repeat the same steps for several job types and then make “Sub-types” for each category
💠 You can also do it by selecting “New Again” and put the name for each “Sub-types” as well.
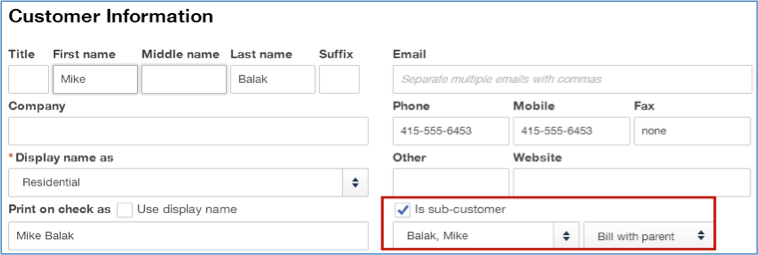
Step 3: Set-up job for customers
💠 Customer Jobs are separate entities to which you can delegate tasks to your clients. To set up a job for a customer, perform these steps:
💠 Do a right-click on the Client option and click the option “Add Job”
💠 Put the details of client when the nest Job windows appears
💠 Next, select the “Job Info” tab and then type “Job name” in the relevant field
💠 Choose the theme option such as “Tax”
💠 Now, select the status under the drop-down “Job Status”
💠 The choices are None, Pending, In Progress, Awarded, Closed, and Non-Awarded
💠 Complete the necessary fields such as Job Description, Start Date, End Date, or Projected End
💠 Choose an appropriate “Job” and then click Ok when all the details are fulfilled.
Step 4: Producing Bills
QuickBooks has the ability to generate estimates and submit dispatch bills. You may also generate progress invoices when working on a project. Here’s how:
💠 Initially, create an Estimate and choose the option “Create Invoices” while viewing the bills
💠 Next, a window appears that offers you three billing choices including:
💠 Generate invoice for entire estimate
💠 Create an invoice for % age of the full estimate and here you have to type the percentage
💠 Create invoice for selected items or different percentages for every item
💠 Choose any of the above 3 options and hit Ok. You will get an invoice based on your selection.
Step 5: Advanced Reporting
Reports are an important part of any study, and the job costing sector is no exception. QuickBooks Job Costing allows you to generate advanced reports to analyze work results, including estimated precision, lost/sunk costs, time and mileage, productivity, and job status.
Step 6: Estimates & Progress Invoicing
Make sure the company uses estimates and modifies orders on a regular basis. Reports may be used to identify a variety of problems, such as missing change orders and so on. QuickBooks can be used to create invoices from projections based on the percentage of the total estimate.
So this blog is all about Job Costing Set up, I hope it will be helpful for you to Set up Job Costing in QuickBooks with ease. Proper job cost reporting takes persistence and, ideally, a good software system. The truth is that better numbers will lead to better results in the form of less costly, more profitable projects.
Frequently Asked Questions
Q1. What are the Advantages of Job Costing in QuickBooks?
Ans: There are multiple benefits of using QuickBooks Job Costing. Few are like:
● Checks the feasibility of projects.
● It enables you to make more accurate predictions.
● Compare and contrast budgeted and actual work costs.
● Have complete cost control over the work.
● Examine both the team’s and individual’s results.
Q2. Where can I Find all the Job Costing Reports in One Place?
Ans: You can simply go to the Reports menu >> Jobs, Times & Mileage reports. Next, run the Job Profitability Detail for one job. Run the Job Profitability Summary and see all the jobs summarized. Now, run your Job Costing reports under the Reports menu >> Contractor reports such as Job Cost by Job and vendor; or Job Cost by Vendor and Job, you can also find here summary or Detail.