The QuickBooks accounting software makes automatic changes in its Fiscal Year End Dashboard after the year end date is marked for a particular financial year. However, some of our readers have informed us that they are facing issues while doing year end reconciliations in QuickBooks online.
In this blog, we will tell you how you can fix such issues while working with QB Online. Simply go through the blog and implement the easy solutions shown herein.

Solutions to Fix the Issues Year End of a Reconciliation in QuickBooks Online
Here is a step-by-step procedure to fix such issues-
Total Time: 15 minutes
Step 1: Review Your Opening and Beginning Balances
In this first step, review your opening and beginning balances. If you find they are not accurate, move to the next step.
Step 2: Verify the Ending Balance Entered by You
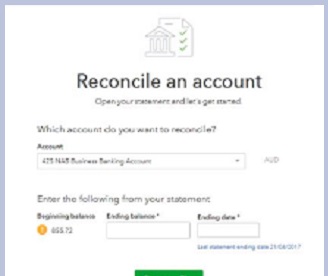
When you initiate a reconciliation process, you need to enter the ending balance from the bank statement. Make sure to enter the correct amount. Here is the process to follow-
🔷 While reconciling an account, select Edit info in the Reconciliation window
🔷 Review the Ending balance
🔷 Review the Ending date.
🔷 Verify your bank statement.
🔷 Make necessary edits as needed.
🔷 Select Save when finished
🔷 If you still notice a difference in QuickBooks Online, proceed to the next Step .
Read Also-:How to Set Up Sales Tax in QuickBooks Online
Step 3: Combine Multiple Transactions into a Single Transaction
Check if your bank combined several payments into a single record. If so, you need to do the same in QB Online. For doing this, follow this procedure-
🔷 Put these payments, into the Undeposited Funds account in QuickBooks
🔷 Do a Bank Deposit to combine these into a single record.
🔷 If you still notice a difference in QuickBooks Online, proceed to the next Step.
Step 4: Eliminate the Correct Transactions
By now you know your correct ending balance and also reviewed possible issues. Next , you should focus only on the transactions that are causing issues. To do this, follow the procedure below-
🔷 Open your bank statement.
🔷 Mark the transactions matching with those you entered in QuickBooks Online.
🔷 These transactions are the ones without any issues.
🔷 Now you will have a reduced list to work with.
🔷 Proceed to the next step
Step 5: Enter Transactions not Appearing in QuickBooks Online
If you see transactions on your bank statement that are not appearing in QuickBooks, follow the procedure below-
🔷 Open QuickBooks Online
🔷 Visit the Sales or Expenses menu.
🔷 search for transactions that exist on your bank statement, but not listed in QuickBooks.
🔷 Select and open such transactions ,if any.
🔷 Verify the Deposit to /Payment account.
🔷 Make sure that the transactions are grouped in the correct account. choose a different account, if required.
🔷 Now you can enter the missing transactions in QuickBooks Online as new sales receipts/expenses.
🔷 When finished, proceed to the next Step.
Step 6: Remove Transactions not Appearing on the Bank Statement
It’s time to do the opposite of the last step. In the Reconciliation window, search for the transactions appearing in QuickBooks Online, but are not listed in your bank statement. Follow the procedure if you see any such transactions:
🔷 Check the dates of such transactions
🔷 Review your bank statements related to that time period.
🔷 Note the amount and date of the transactions.
🔷 For those dates , run a Past Reconciliation report .
🔷 When finished, proceed to the next Step
Step 7: Review Slightly off Transactions
In this step, you need to check if a QB transaction closely matches that mentioned on your bank statement , but the amount is slightly off. If you find any, consult with your accountant.
However, sometimes, your bank may add fees to the transactions that were not included when you entered them into QuickBooks Online. If you find any such fee in your bank statement, carry out the procedure below-
🔷 Click on the + New tab
🔷 Choose Bank deposit.
🔷 Add a bank /processing fee to the account you want to reconcile.
🔷 Go to the Memo section
🔷 Add a note related to the transaction it is attached to.
Read Also-: Undo Reconciliation in QuickBooks Online
Conclusion :
We hope the discussion above would help fix issues faced while doing year end reconciliations in QuickBooks Online .You just need to follow the steps sequentially. If you experience any difficulties in carrying out the above-mentioned steps or if you have any more queries, you may speak to some of the authorized QuickBooks experts.

💠 Frequently Asked Questions 💠
When do you know that there is an issue with Year-end reconciliation in QuickBooks Online?
When you reconcile an account in QuickBooks Online, you compare QB transactions with those on your bank statements. After you reconcile, the difference between the ending balance in your bank statements and QuickBooks should be $0.00. If the balances do not match, you would know that there is an issue with year-end reconciliation.
How can I Combine Transactions in QuickBooks with a Bank Deposit?
Please note that a bank deposit creates a new record in QuickBooks. You need to make deposits one at a time for each deposit slip. Here are the steps to follow-
▪ Click on the + New tab
▪ Choose Bank deposit.
▪ Click on the Account dropdown box
▪ Select the account you wish to deposit the money into.
▪ Select the checkbox for each of the transactions you need to combine.
▪ Do ensure that the sum total of all the selected transactions matches with your deposit slip.
▪ Click on Save and Close or Save and New to finish.


