
In QuickBooks Online, users have flexibility to record and view the financial transaction. These accounting transactions can get entered into accounting software. Many times, it happens when QuickBooks users enter accounting transactions improperly or incorrectly into an accounting system. In that case, they are required to make adjustments to the original transaction even after it has been recorded. This can be done easily in QuickBooks accounting software by creating a Journal entry. We’ll go over the complete process of making a journal entry in QuickBooks Online in this particular post. So continue reading.
Understanding of Journal Entry in QuickBooks Online:
Before you move to the process of making a journal entry, it is pretty important that you should be aware of this term “JOURNAL ENTRY”. It is nothing but an account transaction which is entered or posted to the general ledger. In accounting terms, a Journal entry mainly has two aspects i.e., a debit and a credit entry. And a rule says that the total of the Debit column is always equal to the total of the credit column or both should tally. Moreover, journal entries are considered as the last resort for entering transactions. They let you move money between accounts and force your books to balance in specific ways.
Why do We Need to Make a Journal Entry in QuickBooks Online?
As you know, the general ledger of a company acts as the main group of accounts that are usually used to record the balance sheet and income statement transactions. You usually require making use of the journal entry when you need to:
- Transfer money from a liability, asset or an equity account
- Send money between income and expense accounts
- Also, if the user is required to enter the credit and debit in a general journal or the ledger.
Important Rules Must be Follow while Making a Journal Entry in QuickBooks Online
➤ Journal entries to inventory or payroll accounts should not be made by the user.
➤ In addition, each entry must have at least one account receivable or payable type account.
➤ Furthermore, on the second line of the journal entry, it is essential to use the accounts receivable or accounts payable account.
➤ A customer or vendor is also required for accounts payable or accounts receivable entry.
Few Key Pointers Should also be Noted while Making a Journal Entry in QuickBooks Online
➤ In a single Journal entry, QuickBooks Online does not support multi-currency. As a result, each currency has its own Journal Entry.
➤ If a user accidentally creates an entry and wishes to correct it, the user can do so by deleting and reversing the Journal Entry.
➤ In QuickBooks Online Plus, the user must view the additional column for the location and class.
➤ The user must verify that the entry has a line for A/R or A/P, as well as the vendor or customer name, in order to reflect on the sales or expense tab.
Related article: How to Fix QuickBooks Online Running Slow
Steps to Make a Journal Entry in QuickBooks Online:
Carry out the below instructions very carefully:
Step 1: Move to the Journal Entry Feature:
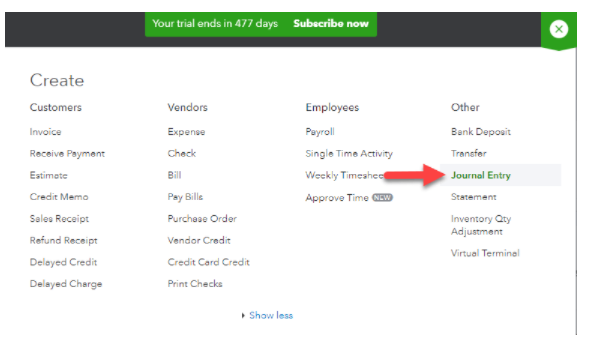
💠 First, you have to navigate the journal entry feature and then click Plus (+) icon which is at the top of the file
💠 It will show you a drop-down menu with a name “Create” in which you can see “Journal Entry” option and simply click on it
💠 Now, it will redirect you to the window where you will have to fill out the required details.
Step 2: Enter the Date and Journal Number:
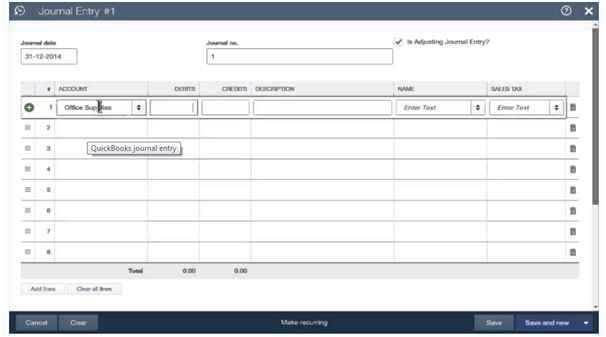
The journal entry form is very simple. When the form is open on your screen then you simply have to edit the “Journal Date” as the “Current Date” and that will be entered automatically in it by QuickBooks as well.
If you’re recording an entry from a different date, double-check that the date is right before continuing. The user must type in the journal number after correcting the date; otherwise QuickBooks will automatically input the sequential number.
Step 3: Enter the Required Information:
💠 Accounts: The user meant the accounts in the chart of accounts when he said “accounts.”
💠 Journal Code: The user will next be prompted to enter the account’s Journal code. The importance of entering a new journal code cannot be overstated. The user should keep in mind that he or she must use the same Journal Code for the debit and credit accounts for the transaction.
💠 Debits or Credits: A recent transaction report can be used to search for transactions, and it should be noticed that Debits is first in line. Also, after the transaction has been saved, check to see if the debit has changed.
💠 Description: To check the transaction information on the Reports, the user must first write a correct description.
💠 Name: In this, you just have to select the customer, vendor, or employee.
If the amount of the debit column entries does not equal the sum of the credit column entries, the user must continue to fill in the distribution line until both transactions have the same total.
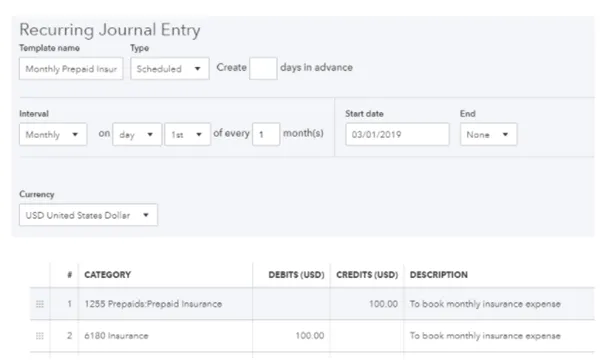
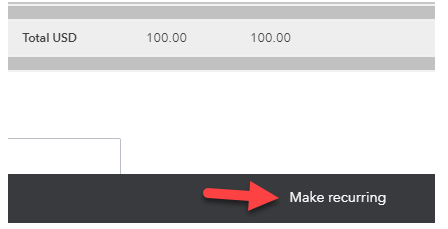
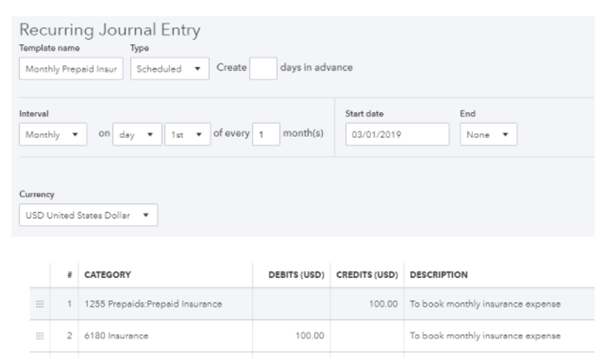
Step 4: Select the Option to Make Recurring Journal Entry Schedule:
💠 Finally, click the tab “Finish” to end the process by saving the transaction.
Also Read: Complete Guide to QuickBooks Closing Entry
Closure:
So, making a journal entry in QuickBooks Online is not a big deal but creating it without making any mistakes is a big task. That’s why; it is only advisable to carry out each and every step with your full attention.
Frequently Asked Questions
Q1. Why do you need to record adjusting journal entries in QuickBooks Online?
Ans: There is more than one reasons are possible when you make adjusting journal entries in QBO:
➤ To adjust tax payable for discounts, interest, or penalties
➤ To reallocate accruals and reversing accruals of prepaid expenses or income
➤ To book amortization or depreciation
➤ To enter bank or credit card interest or fees.
Q2. What to do if I made mistakes while making a journal entry in QuickBooks Online?
Ans: You can reverse a journal entry to correct the mistakes by deleting the original entry. To do so: Go to the Gear icon from the Toolbar. Choose the “Charts of Accounts” from the “Your Company” option. Track the correct account for the transaction. Go to the “Action Column” and then click “View Register”. After that, click “Journal Entry” and then select “Edit”. Now, select “Reverse” within the transaction window. At last, click “Save & Close”.